Web services is use to do operation on data of NAV from outside the NAV environment, you can’t insert, update, delete the data of NAV using web service with proper authentication. For creating the web service in NAV follow below steps.
(Here we are making the web service with gives vendor name based on vendor number. And we consume this service in windows application outside the NAV area.)
Open NAV development environment and create the new code unit. Make one function “GetVendorName”
Function name: GetVendorName
Input Parameter : VendorNumber
Output (Return) parameter : VendorName
Now write below code in function.
IF Vendor.GET(VendorNo)THEN
BEGIN
EXIT(Vendor.Name);
END
ELSE
BEGIN
EXIT('Vendor Not Found');
END
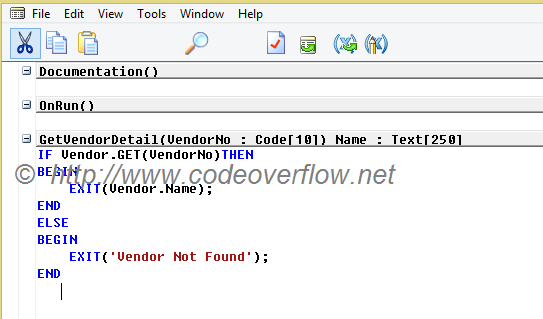
Now save this codeunit with proper Id and Name.
Now open the client application module and search for ‘Web service’ in search text box. Open the “Web service page” and click on “NEW” button, it will ask following details
Object Type: Codeunit
Object Id : *****(code unit id whatever you made.)
Service Name: GetVendorName
Published: True
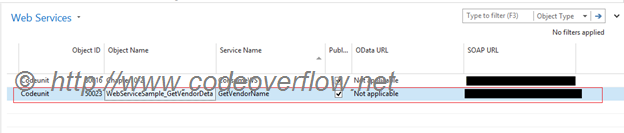
By providing this detail some of the detail it will take automatically and generate SOAP URL. Now close this window by clicking on OK.
Here you web service is ready to use. Now we have to make windows application for the consuming this web service.
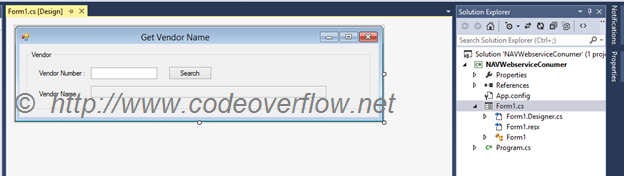
Open the visual studio and create new project for windows application and create one form as shown in below. Give name for text box as
txtVendorNo, txtVenderName, btnSearch
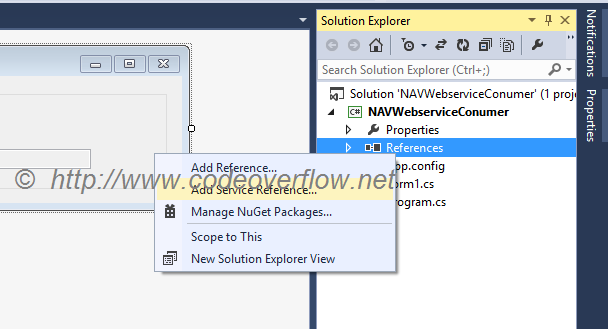
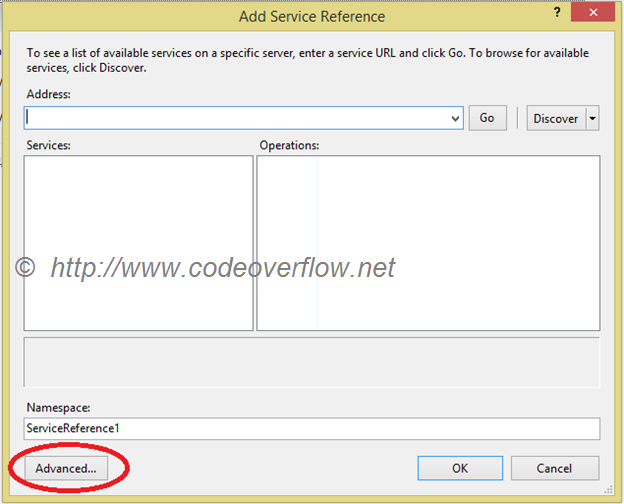
Now in solution explorer right click and go to “Add Service Reference”
Now click on “Advance” button.
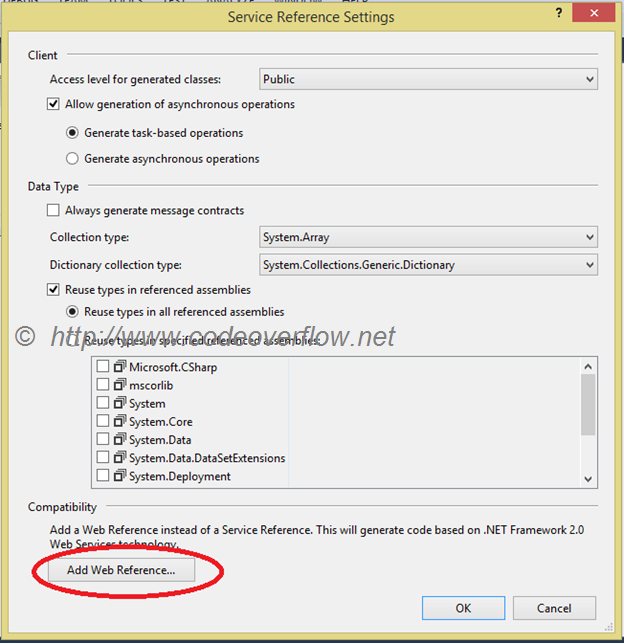
-Now Click on “Add Web Reference” button
Now write or paste the URL from the NAV window to here in given text box
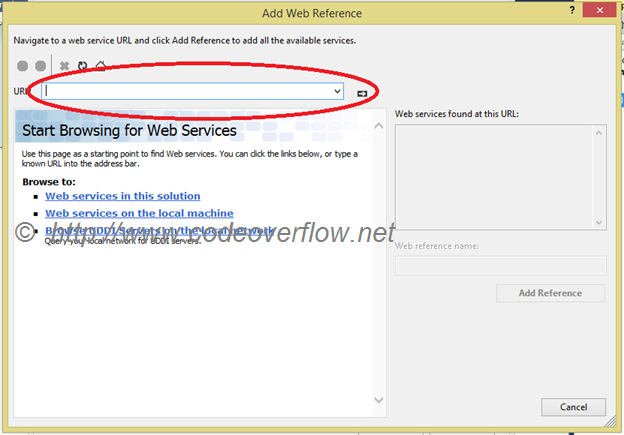
Now click on “Right Arrow” it will ask for credential so enter your right username and password.

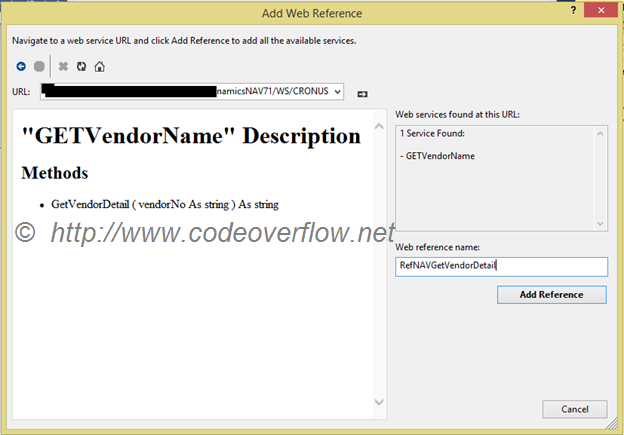
Now it will display the you web service name and it method details as show in below image, now add or change web reference name to “RefNavGetVendorName” and now click on “Add Reference” button.
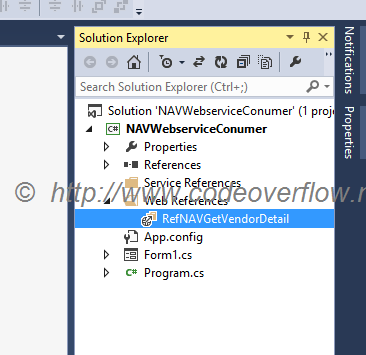
Now you can see your web service is added to you windows application.
Now open the form add write code for consuming the web service , first you have to add “RefNavGetVendor” to using statement. And then write some code in button click event, and make object of the service and set its “UseDefaultCredentials” to true and then access the service method by passing the vendor number to it.
GetVendorName obj = new GetVendorName();
obj.UseDefaultCredentials = true;
txtVendorName.Text = obj.GetVendorDetail(txtVendorNo.Text.Trim());

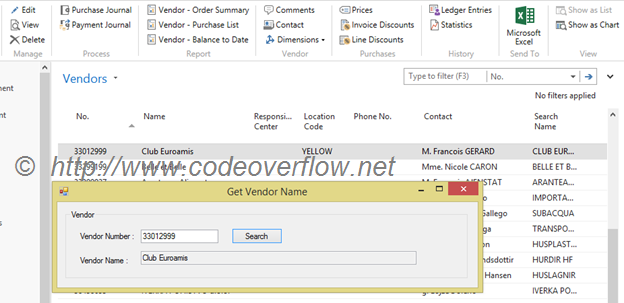
Now run the application and pass the vendor number to textbox and click on “Search” button. It will display the Name of the is vendor as show in image.
(Here we are making the web service with gives vendor name based on vendor number. And we consume this service in windows application outside the NAV area.)
Open NAV development environment and create the new code unit. Make one function “GetVendorName”
Function name: GetVendorName
Input Parameter : VendorNumber
Output (Return) parameter : VendorName
Now write below code in function.
IF Vendor.GET(VendorNo)THEN
BEGIN
EXIT(Vendor.Name);
END
ELSE
BEGIN
EXIT('Vendor Not Found');
END
Now save this codeunit with proper Id and Name.
Now open the client application module and search for ‘Web service’ in search text box. Open the “Web service page” and click on “NEW” button, it will ask following details
Object Type: Codeunit
Object Id : *****(code unit id whatever you made.)
Service Name: GetVendorName
Published: True
By providing this detail some of the detail it will take automatically and generate SOAP URL. Now close this window by clicking on OK.
Here you web service is ready to use. Now we have to make windows application for the consuming this web service.
Open the visual studio and create new project for windows application and create one form as shown in below. Give name for text box as
txtVendorNo, txtVenderName, btnSearch
Now in solution explorer right click and go to “Add Service Reference”
Now click on “Advance” button.
-Now Click on “Add Web Reference” button
Now write or paste the URL from the NAV window to here in given text box
Now it will display the you web service name and it method details as show in below image, now add or change web reference name to “RefNavGetVendorName” and now click on “Add Reference” button.
Now you can see your web service is added to you windows application.
Now open the form add write code for consuming the web service , first you have to add “RefNavGetVendor” to using statement. And then write some code in button click event, and make object of the service and set its “UseDefaultCredentials” to true and then access the service method by passing the vendor number to it.
GetVendorName obj = new GetVendorName();
obj.UseDefaultCredentials = true;
txtVendorName.Text = obj.GetVendorDetail(txtVendorNo.Text.Trim());
0 comments:
Post a Comment
Thanks for comment